Using the Agent
The AI Agent is your coding assistant integrated directly into ScriptO Studio.
Overview
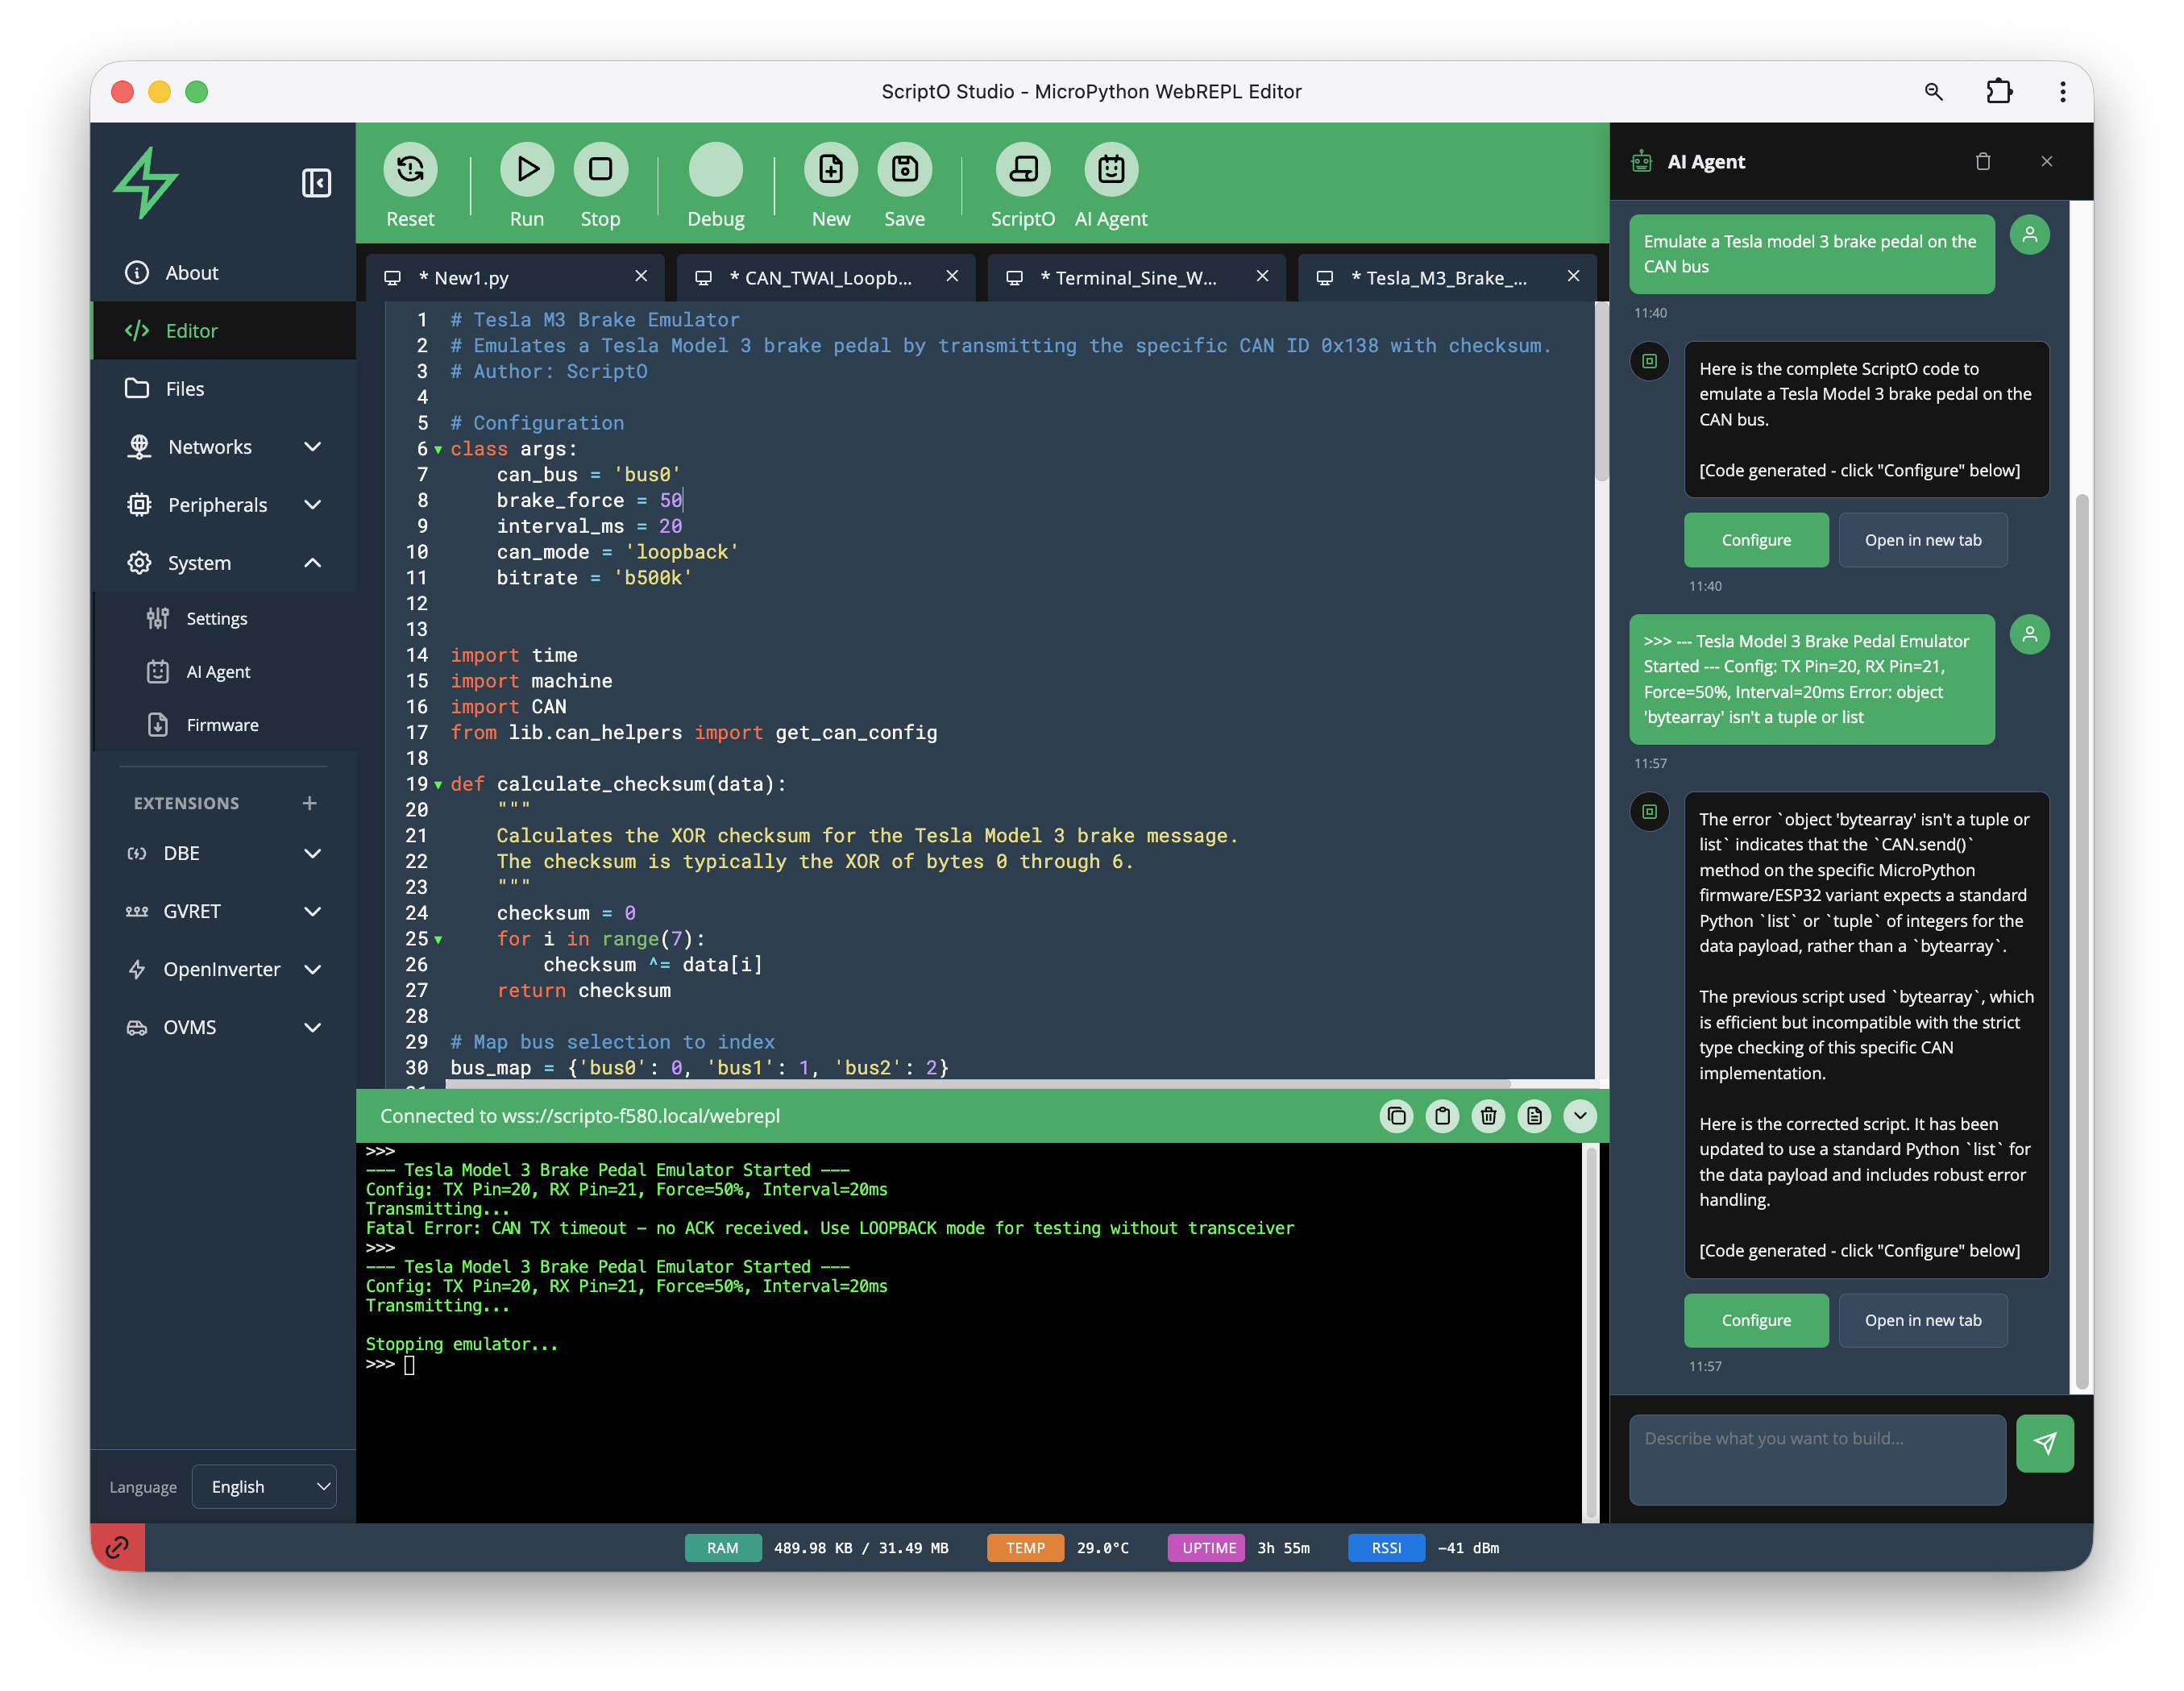
The AI Agent panel appears on the right side of the editor. It provides: - Natural language code generation - Error explanation and fixes - Code optimization suggestions - MicroPython and device-specific help
Opening the Agent
Click AI Agent in the toolbar to toggle the Agent panel.
How It Works
- Describe what you want in the chat input
- Agent generates a response with code and explanation
- Configure or use the code via the action buttons
Example Interaction
You: "Emulate a Tesla model 3 brake pedal on the CAN bus"
Agent: Here is the complete ScriptO code to emulate a Tesla Model 3 brake pedal on the CAN bus.
The Agent provides: - Complete working code - Explanation of what the code does - Configuration options
Action Buttons
Each code response includes buttons:
| Button | Action |
|---|---|
| Configure | Open configuration dialog for the code |
| Open in new tab | Create a new editor tab with the code |
Code Generation
The Agent can generate code for:
Hardware Control
"Blink the LED on GPIO2 every 500ms"
"Read temperature from the BME280 sensor on I2C"
"Send a CAN message with ID 0x123"
Protocol Implementation
"Create a MQTT client that publishes sensor data"
"Implement a simple web server"
"Parse UDS diagnostic responses"
Device Configuration
Error Assistance
When you encounter errors, paste them into the Agent:
You:
Agent: The error indicates that the CAN.send() method expects a standard Python 'list' or 'tuple' of integers for the data payload, rather than a 'bytearray'.
The Agent explains: - What the error means - Why it occurred - How to fix it
Context Awareness
The Agent can see: - Current editor content - Reference your code directly - Terminal output - See recent execution results - Device status - Know if you're connected
Use this in your prompts:
"Look at my current code and optimize it for memory"
"Why did the last run fail?"
"Modify this to use asyncio instead"
ScriptO Configuration
When the Agent generates a ScriptO (configurable script), clicking Configure opens a configuration dialog:
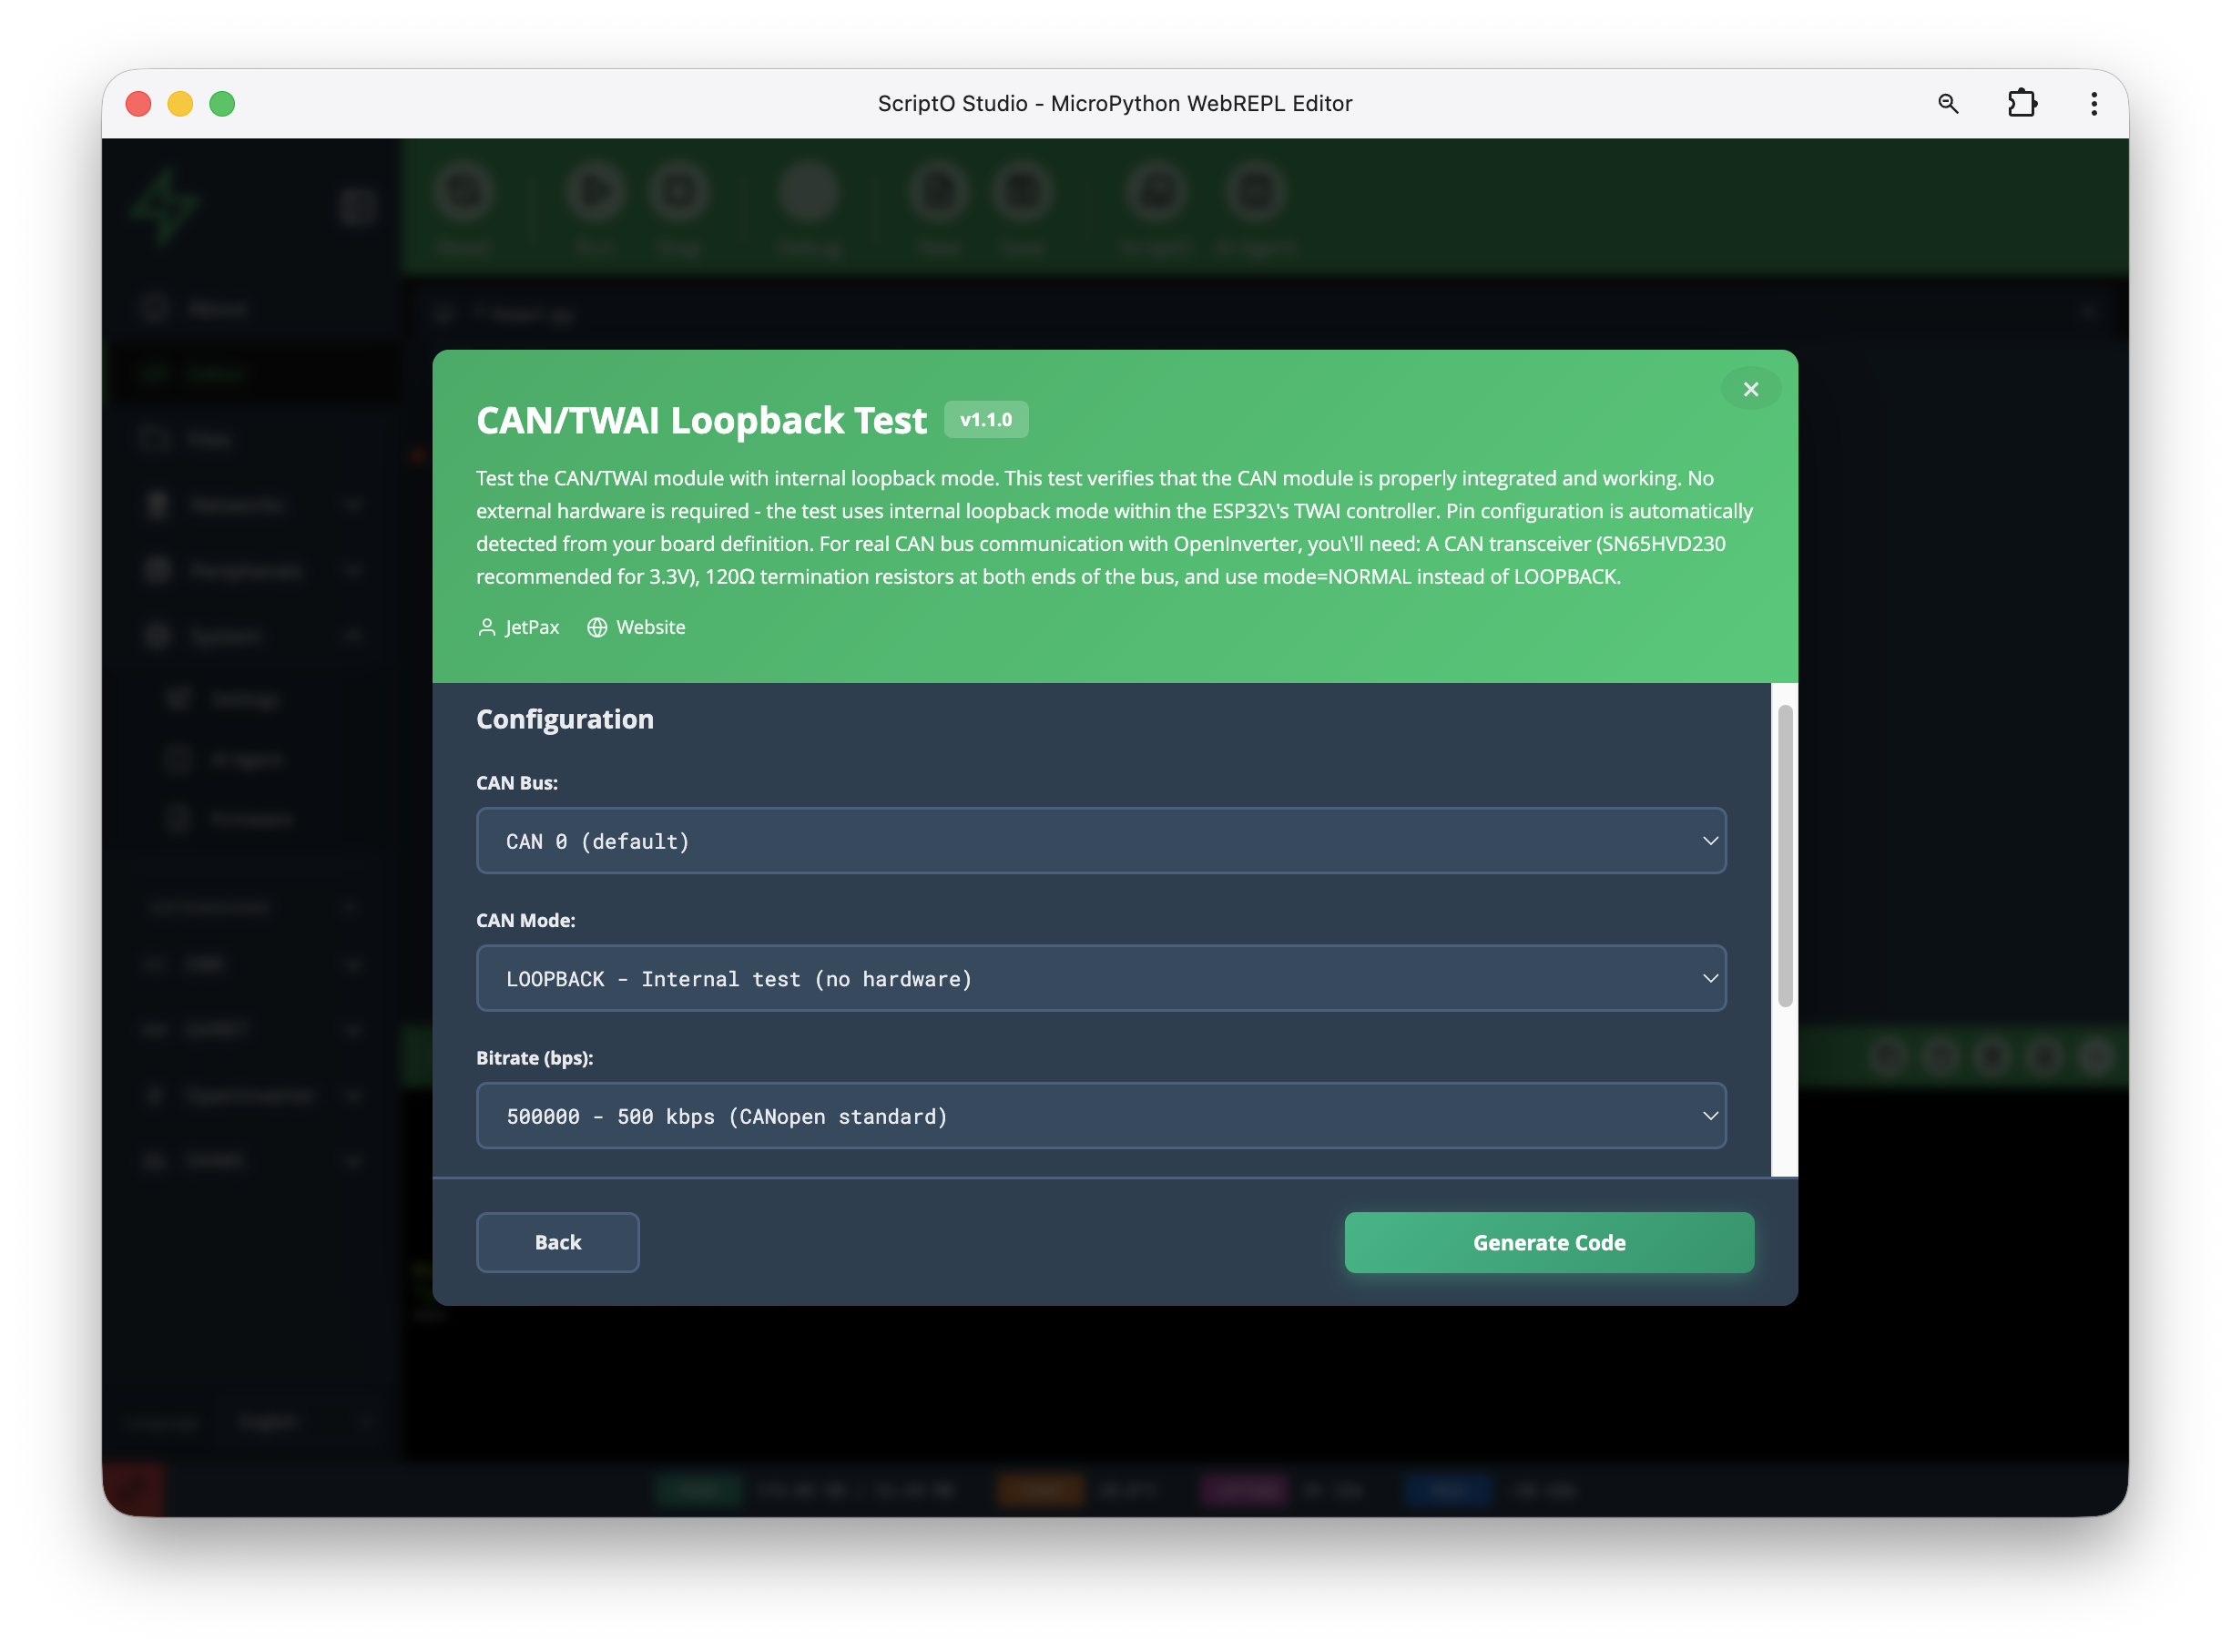
The dialog shows: - Script name and version - Description of what it does - Configuration options (dropdowns, inputs) - Generate Code button
Example configuration options: - CAN Bus: CAN 0 (default) - CAN Mode: LOOPBACK - Internal test (no hardware) - Bitrate (bps): 500000 - 500 kbps (CANopen standard)
Click Generate Code to create the configured script.
Iterative Development
The Agent remembers your conversation, so you can iterate:
- "Create a temperature logger"
- "Add MQTT publishing"
- "Make it retry on connection failure"
- "Add a watchdog timer"
Each request builds on the previous context.
Tips for Better Results
Be Specific
❌ "Make a sensor script" ✅ "Read the BMP280 sensor on I2C address 0x76, log temperature and pressure every 10 seconds"
Include Constraints
❌ "Create a web server" ✅ "Create a minimal web server that serves a single status page and uses under 20KB RAM"
Reference Your Code
❌ "This doesn't work" ✅ "The CAN message in my current code isn't being received - can you check the bus configuration?"
Limitations
- Code must be copied/run manually (Agent cannot execute directly)
- Large codebases may exceed token limits
- Requires internet connection to LLM provider
- May need adjustment for specific hardware variants
Related
- Agent Overview - What the Agent can do
- Agent Setup - Configure API keys
- Writing ScriptOs - Manual script development